Showing posts with label Dollhouse. Show all posts

The Willowcrest Weekly Update


Hello friends! Welcome back for week two of The Willowcrest dollhouse build project. This last weekend I accomplished quite a bit. I had a surprise three day weekend to work on the house. Avaleigh was ill on Friday so she and Jude stayed home with daddy, allowing me a surprise free day.

In the photo above you can see that my stair railing parts arrived. I was very happy to see them because I could not move forward until the stairs were finished and installed. Fortunately they arrived on Friday!


After completing and installing the stairs, AND slicing away part of the door frame trim so that the stairs would fit, I moved back into the dining room. I finished the pink wall paper and painted my door and window trim.  In the photo above you can see the installed door frame, with my handmade molded flourish on the top (see second photo above). The molded accents have been added to all of the dining room inside window moldings. There is a bit of wood filler on the right side of the arch frame where I found an eighth of an inch gap to be annoying. I will retouch that with white paint before I reinstall the front doors.


After installing the stairs and finishing (for now) in the dining room, I added the two side walls and the two bay windows. The windows are both bays, but are constructed differently from one another. I actually like the living room bay best (see top photo). I gave the bay exteriors a coat of the blue-gray paint - yes from Magnolia Market. (I like the quality of their paint, and the color is mixed with kilz as a base).


On Sunday afternoon I decided to start the exterior stone block work. The way this product works is you unroll the block tape and adhere it to a clean painted surface in straight lines.  You mix the mortar to resemble frosting and apply that to the surface of the dollhouse, spreading over the tape.  There was a learning curve here.  First, is do better math.  I purchased the kit before I opened the house kit and I thought the four square foot package would cover my house. Ha. Only if it had been four cubic feet.  As it was, I had to order a second kit. My second lesson really could be 1B, as it deals with the shortage of mortar and tape materials.  You cannot leave the tape on the house for days, but rather for hours.  So after I started applying the tape I had to finish the job or risk ruining the house surface and the tape.  The next lesson deals with the application of the mixture.  Try to keep the mortar mix smooth and of even thickness, otherwise, like me, you will be sanding the block surfaces.  That process began tonight.  Sigh.  


As you can see in the photos above and below, I have more sanding to do. However to reward myself for what I have done so far, I permanently installed the front door, including three of the molded trim pieces I made for the house exterior. There are many more homemade trim pieces that will be applied as the house nears completion - which is a few weeks away.


I am going to end this weekly update with a photo of the front door.  I am very pleased with how this door turned out.

Thanks for stopping by today. Check back in the near future for more updates.
Dollhouse Number Two - Under Construction


Hello friends! I know I have been MIA from the blogosphere for several weeks.  I guess that is what happens when you leave your design team and become the full time childcare provider. I am not going to even sugar coat it, I am counting the days until the end of the school year! As much as I ADORE my grandchildren, I am ready to have my free time back.

And speaking of my free time, I had time over the long weekend to really make a start on my latest dollhouse.  I am using a Greenleaf company dollhouse kit, The Willowcrest.  Again, I am not going to lie - this kit is much more difficult than the last dollhouse kit.  I think part of the difficulty in this kit is the poor instructions, and every single piece is still in the thin plywood the cut was stamped into. And the pieces are spread haphazardly over 15 sheets of plywood.  WOW.  

Just like my last house, I am "Susanizing" this house. The real name for that is "dollhouse bashing", where you take an existing kit and change it to make create your own version. In this house I am rearranging some of the rooms and walls as well as opening up the design to better see some areas. I am also removing the front porch roof and creating a total new look for the exterior.


Today I am going to give you a tour of the first floor as it exists so far.  On the left side of the first floor is the living room and open entry way (in the actual house design this was supposed to be a tiny entry way with stairs and the more closed kitchen). I cut the door opening much larger on the front of the house to accommodate the double doors. I wanted for the front entry and the staircase to be seen, which lead me to change the room off of the entry to the living room, allowing the spaces to flow together.


In the photo above you can see the unfinished stairs placed where they will eventually sit. I am still working on the stairs as the new railing I ordered has not arrived yet. I wanted something a bit more detailed than the railings that came in the kit. You can also see the cherry and black fireplace I plan to use against the pink print wallpaper. 


Across from the stairs is the entrance to the dining room. 


This side of the first floor is more open in the kit. I am adding a partial wall to create a formal dining room and a kitchen. I am still debating which wall paper to use in the dining room. I have narrowed it down to two different looks, both of which match the pink marble tile checkerboard flooring.


The kitchen has a very fun tile flooring, complete with border. It features a funky tile wall, and will be papered in denim blue wall paper.  I think it will look very nice when finished. 

Last night I built an upside down U shaped wall to go between the kitchen and dining room.  It has a nice sized opening to allow the dining room to show, but it defines the kitchen area. 

That is where I am to date. I have a long, long way to go on this house. Hopefully once school is out I will make much quicker progress.  And yes, I will keep you posted with regular updates.

Thanks for stopping by! 

My Dollhouse Interior


Greetings friends. Today I am back with a peek inside my dollhouse.  The photo above is an overview of the entire inside.  I am still missing one light fixture and many little decorations, but the house is coming along nicely.


I am going to start at the bottom and work my way up.  On the bottom floor is my open floor plan kitchen and dining room.  I deleted the stairs from the design as well as the room divider. I liked having more space to decorate.  I also like that you can see the stained glass front door in the dining room. The dining room is papered in miniature wall paper with wainscoting beside the fireplace.  The kitchen is painting with Magnolia Market paint, with one wall bricked for a more rustic look.


There are many detail already in the kitchen: the plates on the wall and counter that I made, the mini mixer, the cookware, the baking set, etc.  And many more small accessories are still in the mail (additional canned goods, glassware, etc).  You cannot see from this angle, but you may be able to see in the photo below that there is a plate rack over the sink full of plates I made.


Below is the dining area. I made the plates, the platters, the dishes in the china cabinet, the wall decor and curtain, the mantle decor, and the rug which matches the kitchen rug. I also painted and stained the farmhouse dining table.

I printed all of my rugs onto canvas and backed them with interfacing.  


The middle floor of the house is dedicated to the large living room.  The white furniture blends nicely with the shabby chic tables and the Magnolia Market paint on the walls.  The light fixture is a casual drop light with a crown piece that I made from clay to match the wall color. I made the window treatments and the pillows from fabric I printed.  I still have a corner bar coming for this room as well as a lot of tiny details. Incidentally, two of my favorite house pieces are in this room - the clock and the large Gothic framed mirror.


I love the fireplace in this room.  It was fashioned by Benedictine Monks, based on a real fireplace. The dog on the sofa is a small breed representative of our little dog.  I made the lamps and many of the aqua and teal accents in this room.


The third story in the house has two bedrooms, a pink master bedroom and a smaller blue room.  I actually like both rooms, but wish I had left a bit more space in the blue room.  Alas, first build error.


The pink room features decorative wall panels and pink silk drapes that I made.  I also made the quilt, lamp shade, pink ceiling wire cover, and rug.  All of the accents on the vanity are homemade.  I had such a good time with them.  


The blue room is papered in dollhouse wallpaper - blue toile and mini stripes. I added chair rail molding in addition to crown and base molding. I made the quilt in this room also, as well as I built the bed, side table, and chair.  The bed head and foot boards have panels of the same toile print fabric inset.  I made the ceiling lamp shade in this room as well as the table lamp.  The wardrobe was purchased unfinished and painted and detailed.


The rooftop tower room is a fun getaway.  It is The Beatles music room.  This room was so fun to create. I painted it with Magnolia Market paint and added a shelf for all of my (yet to be purchased) 60's memorabilia. I built the bench in the back of the room using the shutters I did not use on the house.  I printed a teal and orange rug, then an orange cover for the bench.  I ordered the teal, orange, and white pillows from Australia.  There is a turntable on which to play the Beatles LPs and an over sized lava lamp in the back corner.  The drum set was actually a Christmas ornament.  I added The Beatles drum logo to the front of the bass drum.  I found the guitar on a miniature site and was delighted to find the guitar stand on a different site. The room contains three Beatles posters from three different time periods in their career.  I still have candles to add to the room and some other details.


Now that the house is built, I realized that the miniature collecting will not be over for a long, long time.  There will always be a tiny something to add someplace.  Oh, and then there are holidays to prepare for.  Yes, miniature collecting is going to be a long term activity!!

Thank you for stopping by my blog today.  

Dollhouse Build Project


Greetings friends. Today I am going to give you peek inside my non-paper crafting hobby life. Dollhouse miniatures. I first loved dollhouses as a young girl. I still remember the Christmas that Santa brought my first dollhouse! I think two factors crossed paths and contributed to my re-venture into the world of miniatures. First, for the last year my granddaughter has been playing with Calico Critters and their houses.  Apparently I am THAT grandmother who wanted her to have more than one house and one set of furniture. And then there is my friend Marti.  For what seems like two years that gossipy Internet site, Pinterest, has been showing me the miniatures that Marti has been pinning (because Pinterest is a big gossip and tells all of your friends what you are up to). It finally all got to me and I wanted my own dollhouse!

I spent several weeks (read months) looking at dollhouses on Pinterest and sometime last winter I decided that I wanted to build a dollhouse of my own.  After much serious looking I began to narrow my choices and select a house kit.  I wanted something not too complicated, with GREAT directions, and yet stylish design.  I also did not want a huge house, like The Pierce house I built 34 years ago.  I finally chose The Alison Jr kit by Real Good Toys (available at Hobby Lobby with your 40% coupon).

But you know me, well a lot of you do anyway. I could not just go with the set kit design. Oh no. I spent days reading the construction instructions and looking at Pinterest again for Alison Jr hacks. I knew I wanted to personalize the house and make my own mark on it. I made a number of notes on the plans, brainstorming ideas.

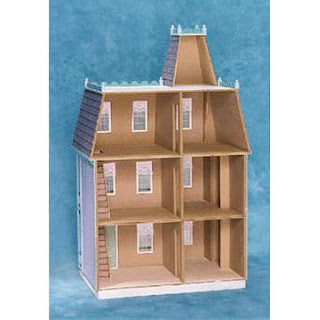
The two photos below show the basic Allison Jr kit house.


To set the stage, when I first decided to build the house I did five weeks worth of Bitten By the Bug 2 and The Merry Christmas Blog projects, thinking I would finish the house in about a month. In the meantime I ordered the parts I thought I would need for the build. Then I put away my Cricut and most of my scrapping toys. Little did I know, that was not enough time. Well, to be fair, if my international vendors had quicker shipping it would have been plenty of time. But alas it was not.


So what changes did I make from the original kit? The first change was to remove the single entry door and add French doors to the main entry.  I ordered the the doors and when they arrived I traced where I wanted them to go.  Hubby cut the enlarged doorway for me and I installed the door.  The other alteration I made to the exterior of the house was I added a window to the tower.  I measured and traced the window from onto the tower front, then I drilled out the the window area.  I also decided not to use the porch rails and shutters that came with the kit.


I made some design changes to the inside of the house as well. First I went with an open floor plan (watching too much HGTV perhaps?). I also decided not to use the stairs. I did not like how much floor space was lost to the stairs on both the first and second floors. I will tell you more about the interior changes when I post on the interior.


I purchased shingle dye and dyed the roof shingles a dark gray. The photos above and below do not show the true color of the house or the shingles.  Please refer to the first photo in this post for truer colors.

I used Magnolia Market paint on the exterior of the house (thank goodness you can purchase 8 ounce cans). I chose the color Soft Linen for the exterior and one wall of the kitchen. I used white paint for all of the trim.


I painted and added my own porch rails. I chose a painted wrought iron look. I also added the balcony on the top bedroom window.  Lastly, I added stained glass panels to the front doors and to the lower left kitchen window.


No dollhouse is complete without landscaping. I added the window boxes filled with pink and purple flowers. I also added a flowerbed and a small lawn. There is a potted palm tree on the porch, and as soon as they arrive in the mail, I will be adding three hanging plants to the front porch openings.  


I have to tell you that I have LOVED building this house.  In all I only had two frustrating days where I had to walk away and start again the next day.  One of those days involved the dreaded electrical installation. I only had to ask Doug for help on one wiring issue - positive and negative wires I connected to the transformer (I did not want to get that wrong).


In addition to the plants, I am still waiting for a number of inside accents as well as two more light fixtures.  When those arrive I will make quick work of installing them and then I will share the house interior with you.

How much did I love building this house?  I have already ordered another, more challenging kit.  I will have to get much further ahead with my paper crafting this time!!